


What Car Maintenance Can I Do At Home?

For the past nine years as a BMW technician I’ve heard more and more complaints about how expensive regular car maintenance is becoming.
Since getting into the trade just under a decade ago, I’ve watched labor rates climb steadily. Add to that the increased complexity of certain maintenance tasks and it’s now more expensive than ever to keep your car in good condition. Shy of buying a new car with a service-inclusive warranty, there are some aspects of car maintenance you can do at home with little to no mechanical background.
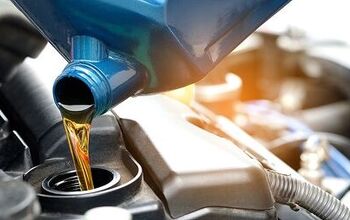
Oil Changes: Do It At Home!
Engine oil and filter changes are nice and straightforward for the most part, so as long as you can get to the filter easily an oil change is first in line for home projects. To get the ball rolling it’s best to head out for a quick cruise around the neighborhood to get your car’s engine up to operating temperature. The increase in temperature will help thin the engine’s oil and allow it to flow more freely while being drained.


If your car sits relatively low to the ground, raise the front of the vehicle up on jack stands if available. Once the vehicle is secured, it’s time to drain the oil. Start by opening up the oil filler cap. This will allow the oil to flow freely out of the engine. Position a catch-pan of some sorts below the drain plug and cautiously crack it open. The plug is likely to be a little warm and once it is removed your engine oil will flow out in a hurry, so make sure you’re ready to get your hand out of the way fast.
Once the engine oil is mostly drained, it’s time to move on the oil filter. Depending on engine configuration you may have an easy-to-access filter in a housing at the top of your engine, or it might be trickier.

Finally it’s time to pour in the new engine oil. I typically put in about half a quart less than the specified amount to get things going. Before checking the oil level it is always recommended to run the engine for a few seconds to get things flowing. After turning off the engine, have a look at the dipstick and top off the oil accordingly. It’s worth mentioning that it takes one full quart of oil to go from the “low” mark on the dipstick to the “full” mark.

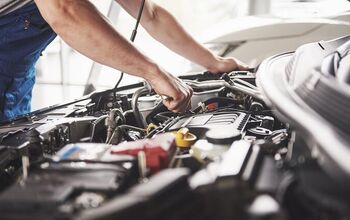
Coolant: Do It At Home!
Changing your car’s coolant is the only other fluid change I would recommend tackling at home. The key concern with the cooling system is having access to a drain point on the engine block. Most service facilities have a vacuum-powered machine to drain old coolant from an engine, but it is possible to get most of the old coolant out of your car without it. Unlike some repair tasks, draining and filling coolant is a bit of an improvised job.
The first half of the battle here is draining the radiator. With the coolant reservoir lid open and a catch pan placed below, disconnect the lower radiator hose from the radiator. This should drain the majority of the coolant in the circuit outside of the engine block. Next comes the tricky part. If you can find a

Once you’ve managed to drain the majority of the coolant out of your car, its time to reconnect the hoses and fill the system back up. In many cases the cooling system will have a bleeder screw somewhere near the reservoir or the top of the radiator to let air out of the system as it fills. Pour the coolant in slowly with the bleed screw opened and close the screw once coolant starts coming out of it. From there it’s a slow process of running the car with the heat on high and adding coolant until the reservoir stays full. Having the heat on high will allow the coolant to circulate through the heater core and prevent any air pockets from forming. Once you think the level is correct, shut the engine off and allow it to cool down over a few hours. At that point have another look, and if the coolant level is still correct you should be good to go. After your first home coolant flush I’d recommend keeping a spare jug of pre-mixed coolant in the trunk for a few days. It’s always possible that there’s a bit of trapped air in the circuit that will eventually work its way out and leave the reservoir lower than it should be.
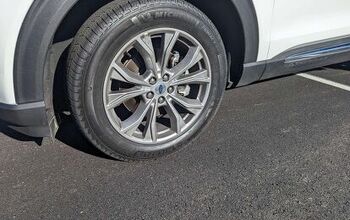
Brake Pads: Don’t Do It At Home!
Replacing brake pads and rotors on the ground using a floor jack is especially aggravating. More often than not you’ll find seized bolts, or a rotor that has rusted itself onto a hub, and you’ll spend the same amount of time on one corner that a licensed tech will spend replacing brakes on all four corners. Unless you’re a real glutton for punishment, I would hand off brake work any day of the week.
Brake Fluid: Don’t Do It At Home!
The second brake-related task I recommend avoiding is the flushing of brake fluid. With two people and a fair bit of patience it is possible to bleed out your old brake fluid, but once again, access isn’t great without a hoist. More importantly, the risks involved if the system sucks in air or a bleed screw is incorrectly tightened can be catastrophic so do yourself a favor and leave that one to a professional as well.
Cars, Motorcycles, ATVs, Watches-if it has gears somewhere in its inner workings, there's a good chance he has an interest in it. As Gear Editor, Justin leverages his technical background as an automotive technician and his dozen years of experience as a journalist to break down products, parts, accessories, tools, and other items in a manner more suited to a broader audience. He's also tasked with sniffing out deals and promotions in these same categories.
More by Justin Mastine-Frost


Comments
Join the conversation
Don't do brake pads at home? Come on: brake pads are ridiculously easy if you just have a few simple tools.
Don't do brakes at home? That is like the second most common maintenance item for a DIY job.