


The Best Headlight Restoration Kits
All passenger vehicles in North America have had polycarbonate plastic headlights for decades, and they all have one thing in common: They are constantly exposed to the elements and over time they turn dull, yellowed, or foggy. Not only does this look bad, but it can cut down the amount of light dramatically. Fortunately, headlight restoration kits can restore almost all old headlights, or at least bring make them bright enough to be safe again.
In fact, a study from AAA shows you can lose up to 80% of your headlight’s performance due to age. Even upgrading to bright LEDs won’t compensate for that:
Research revealed that deteriorated headlights, when used on low beam, provided just 22 percent of the amount of light a new headlight does when operating at full capacity. AAA also examined the effects that replacing or restoring a headlight can have on improving the amount of light produced. Replacing headlights with original equipment manufacturer parts is the most effective method to restore light output back to 100 percent.
New headlight clusters are expensive, hundreds of dollars at least, and in some cars it can be an intimidating job, even for an experienced home mechanic. That’s why we spent a couple of days testing, comparing, and reviewing the top types and brands of headlight restoration kits, and we’ve used that information to choose the top picks (and call out some issues) in the most popular brands on sale.
Why You Should Trust AutoGuide's Product Reviews
We drive the latest new cars, trucks, and SUVs, but did you also know the team at AutoGuide.com tests tires, waxes, wiper blades, and pressure washers? Before we recommend a product as a top pick in one of our popular product lists, our editors put it to the test. We run through all its features, test the claims that the brand makes about each product, and then give an honest opinion on what we like and don’t like from our personal experience. As experts in all-things automotive, from minivans to sports cars, and from portable jump starters to ceramic coating, we want to make sure you buy the product that’s right for you.
How We Selected Headlight Restoration Kits
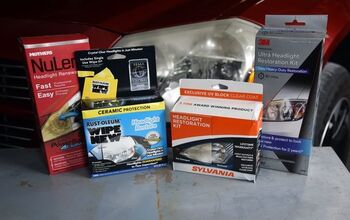
There are several different kinds of kits: Hand sanding, drill attachment, wipes only, dry and wet sanding. We purchased a selection of these from the top-selling brands, and figured out not just which ones performed best, but which methods we liked best, and worked the best for different needs.
We think you’ll be able to get good results from any kit that uses a drill attachment, multiple grades of sandpaper down to 3,000-grit, and a UV coating. There may be occasions where you’ll need to hand sand, but it takes so much more work to achieve the same results as a drill attachment that we recommend avoiding it if you can. We couldn’t find any wipe-only kits worth using, and removed them from our recommendations.
Table of contents
- 1. Editor's Pick: Mothers NuLens Headlight Renewal Kit
- Promoted Product: Meguiar's Heavy Duty Headlight Restoration Kit
- 2. Best Results: 3M Ultra Headlight Restoration Kit
- 3. Best for Hand Sanding: Sylvania Headlight Restoration Kit
- 4. Cerakote Ceramic Headlight Restoration Kit
- 5: Meguiar's G2970 Two Step Headlight Restoration Kit
- 6. Worst Kit: Rust-Oleum Wipe New Headlight Restore Kit
- How Does Headlight Restoration Work?
- How To Make Your Own DIY Headlight Restoration Kit
- Headlight Restoration Dos and Donts
- How Do You Use a Headlight Restoration Kit?
- Recent Updates:
1. Editor's Pick: Mothers NuLens Headlight Renewal Kit
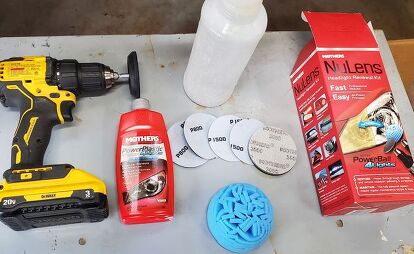
Mothers NuLens Headlight Renewal Kit came out on top in our testing, and earns the top spot here. It's not the absolute best—3M is better—but it is easier to use as well as reusable, and both well thought out and high quality.
Like all the best headlight restoration kits, Mothers uses multiple sanding steps, with a velcro hex shank attachment that you can use with either a drill or a driver. It starts with wet sanding from 800 to 1,500-grit, then dry sanding at 3,000 grit. The final step is polishing using a foam polishing ball and a few drops from the 8.0-ounce PowerPlastic 4Lights polish bottle.
We prefer wet sanding because it controls dust, and the sandpaper doesn't clog as fast. If it does, you can just rinse it out and keep working. It has a lot of potential to make a mess, though, and the polishing ball will really spray compound around if you're not careful (ask us how we know). It's a little harder to see what you're doing when wet sanding, too. Mothers doesn't use the same sort of UV resistant clearcoat as most kits, but the polish does leave a protective polymer film. It won't last as long as a clearcoat and needs regular touchup, but it doesn't require any curing time. If you want the best of both worlds, pick up a bottle of the Dupli-Color HLR300 clearcoat from that kit, and buy yourself two years of protection.
Pros | Easiest kit to use with second best results, wet sanding process controls dust, hex shank attachment, no curing time |
Cons | Requires a drill or driver, painter's tape not included, needs regular touchup |
Promoted Product: Meguiar's Heavy Duty Headlight Restoration Kit
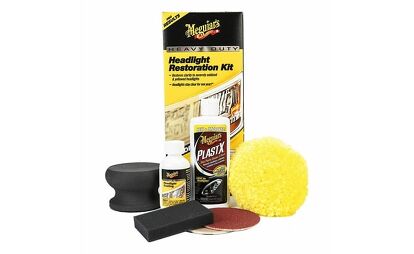
Sometimes you need more than a routine clean. If you’re looking for something a little more professional-grade, try Meguiar's Heavy Duty Headlight Restoration Kit. Designed to handle the worst you can throw at it, all you need is a standard corded drill, and this Meguiar’s kit can handle the rest. From heavy yellowing to serious oxidization and thick clouding, this kit can help you get rid of it, leaving your headlights clean, clear and refreshed.
Start with a quick sand using the included sanding disks. Then, follow it up with the kit’s PlastX Clear Plastic Cleaner Polish and Easy-Buff Wool Pad, which easily attaches to any corded drill. Finally, finish it off with the kit’s Headlight Protectant to keep your headlights protecteed from yellowing and re-oxidation for up to 12 months. Much like the rest of the kits on our list, it’s going to require a bit of elbow grease, but reviewers report being thrilled with both the long-lasting results and excellent value they get from Meguiar's professional-caliber kit.
*This is a sponsored placement.
Pros | Reputable brand, heavy duty all-in-one kit includes protectant coating as well |
Cons | One-time use kit, requires a drill for best results |
2. Best Results: 3M Ultra Headlight Restoration Kit
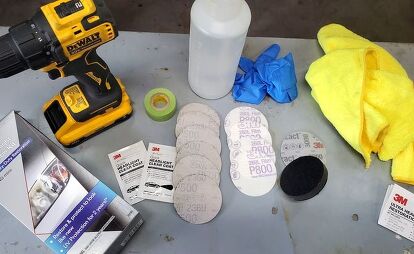
We really go back and forth on whether we like 3M or Mothers best, and there is a lot of overlap between the 3M Ultra Headlight Restoration Kit and our #1 pick. We went to a showdown between the two, and tested them head-to-head three times to pick a winner. In the end, 3M was the best headlight restoration kit we used. However, from 10 feet away you can't tell the difference between the two (or Sylvania).
This kit has a lot going for it. We had a better sense of what was going on with the lens with 3M's dry sanding at 500 and 800 grit, and between the final 3,000-grit wet sand and UV wipes, we ended up with literally new-looking headlights. 3M says their coating is good for up to two years, and it only requires one hour of curing time. The drill attachment had a thick, soft pad that conformed well to curves on the headlight.
However, it makes a lot of dust and while polycarbonate is nontoxic, we don't know about the old headlight coating you're removing and turning into fine powder (we'd guess it's not good for you, not to mention the microplastics). Dry sanding also clogs up pads faster, so the kit includes lots of them. The round shank of the attachment meant we had to use a cordless drill, which was much heavier and larger than the impact driver that Mothers hex shank let us use. It's also a one-time use kit: You get one UV clearcoat wipe for each headlight, and that's it.
Pros | Short curing time, two-year protection, thick padding on attachment, includes painter's tape, terrific results |
Cons | Two wipes means no room for error, dry sanding is dusty, round shank on drill attachment |
3. Best for Hand Sanding: Sylvania Headlight Restoration Kit
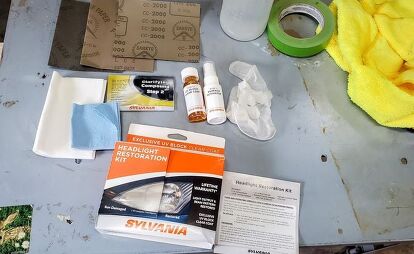
We recommend a drill attachment kit for most people, but if your headlights have complicated curves and shapes, you'll probably need to hand sand. You could hand sand with the little discs that come with the 3M or Mothers kits, but we've done enough headlight hand sanding to know that would be no fun at all.
Sylvania says the job takes 30 minutes per headlight. We'd say allow yourself at least 45 minutes for the first one, depending on whether your hands cramp or not. First, you'll use the "Surface Activator," which is a proprietary formula that will soften the plastic, making it easier to sand smooth. Then, you'll do the actual sanding and polishing before sealing the headlight lenses with a UV Block Clear Coat applicator.
We got good results from the Sylvania Headlight Restoration Kit, but it only sands down to 2,000-grit, then uses a polishing compound. It worked, but not as well as sanding to 3,000-grit with other kits, and should have applicator pads for the rubbing compound, as the included cloth didn't work very well. Applying the UV clearcoat is a messy process, and there's a longer curing time, but Sylvania has a lifetime warranty on the product.
Pros | Wet sanding process, large enough sheets of sandpaper to be useful, plenty of clearcoat included, lifetime warranty |
Cons | Only goes to 2,000-grit, rubbing compound is hard to use with included cloth, 4-6 hour curing time |
4. Cerakote Ceramic Headlight Restoration Kit
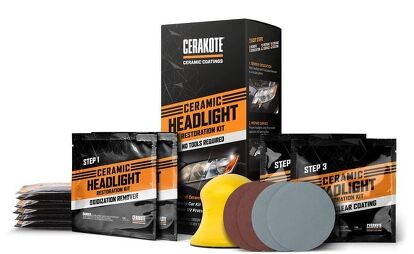
If you're a fan of detailing your car, you've likely heard of ceramic coating and detailing products. Cerakote offers a ceramic headlight restoration kit that is formulated to chemically bond to your headlights, providing UV protection for as long as you own the vehicle. The company offers a limited lifetime warranty that this coating will last as long as you own the vehicle. Otherwise, they'll cover the next kit for free.
We haven't tested Cerakote yet, but it's an interesting wet sanding kit that takes some cues from automotive bodywork, and includes a foam sanding block to use with the provided sandpaper. This seems like a good idea that addresses our biggest complaint with hand sanding kits. It should make it easier, but it will still require more work than machine sanding. There are only two grades of sandpaper in the kit, which in our experience with other kits makes it hard to get a great finish.
Cerakote also uses a prep spray, like Sylvania, and we found that effective. Cerakote says there's an initial UV protectant in the prep spray, and its party trick is a ceramic wipe-on coating that's supposed to be more durable than traditional UV protectant clearcoats. The company also says the coating will help fill in scratches and chips that you can't get out with sanding.
Pros | Ceramic coating protection, no tools required, layer of UV protection |
Cons | Price, results may vary on heavily oxidized headlights |
5: Meguiar's G2970 Two Step Headlight Restoration Kit
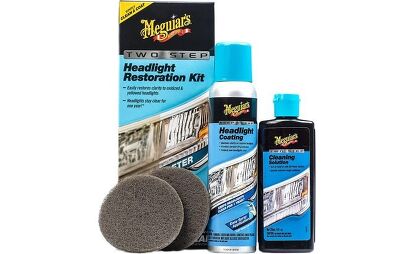
Meguiar's headlight restoration kit is a little different from most of the others. After applying the cleaning solution, you use a mildly abrasive cleaning pad to haze the headlight evenly, clean it, then apply two coats of the aerosol protectant. Without the dust of dry sanding or muddy runoff of wet sanding, this is probably the neatest option available.
If that sounds a little too good to be true, it kind of is. Meguiar's says you'll have to apply, scrub, and wipe off the solution multiple times to get an even haze. Unless you want spots of clearcoat on the rest of your car, you should mask off extensively with painter's tape and newspaper. Because it's a relatively gentle process, it won't do well on very cloudy or damaged headlights, and the results we've seen don't look as clear as our top two picks with multiple grades of sandpaper.
The coating should last for about a year, which is not as long as most others, but the big aerosol bottle of clearcoat means you should be able to touch it up preventively a couple of times a year, and make it last a lot longer.
Pros | Aerosol clearcoat, simple process, probably the least messy option |
Cons | 24 hour cure time, hand work, not good for heavy damage, requires thorough masking |
6. Worst Kit: Rust-Oleum Wipe New Headlight Restore Kit
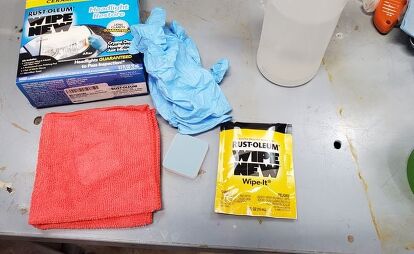
We're leaving this kit on the list because it's a best seller, but we don't recommend using it. It was the hardest kit to use in testing, produced the worst results, had the longest curing time, and used frightening chemicals.
The Wipe New Headlight Restore Kit (Rust-Oleum has understandably taken it's name off it since we bought ours a few months ago) includes a tiny, stiff, two-sided sanding block, microfiber towel, gloves, and UV clearcoat pad. It uses our preferred wet sanding technique, but the pad is so small it's impossible to get a good grip on it. We got hand cramps and trigger finger just doing 40 square inches in our test, and we couldn't imagine using it on the remaining 280 square inches of our Dodge Magnum RT's large headlights. The pad is also too stiff to conform to curves, making it hard to sand evenly. Its one benefit was that it provided excellent feel, so it was easy to tell when the texture of the lens changed.
The final coating pad is festooned with hazardous materials warnings, and the smell immediately made us open the shop doors. Using one pad for both sided means it has to be saturated with fluid, and it dripped down the headlights. It requires the longest curing time of any headlight restoration kit, 24 hours.
We can't speak to the durability of the coating, but Rust-Oleum guarantees it for life.
Pros | Lifetime guarantee, easy to feel what you're doing |
Cons | Tiny sanding pad is very hard to use, hazardous chemicals, extremely long curing time, poor results |
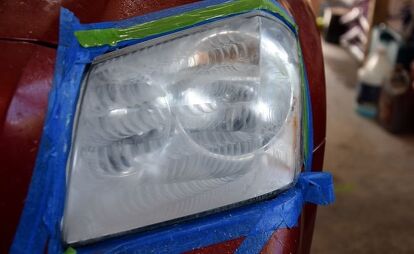
How Does Headlight Restoration Work?
Overtime, your car's headlights will eventually succumb to the environment, causing them to develop a yellow or hazy appearance. This is normally caused by UV exposure along with general weather, dirt, and debris. These conditions will cause the protective layer of your headlights to break down, resulting in discolored lenses that appear foggy and old.
Headlight restoration products are designed to get rid of that unsightly appearance by using solutions that break way all the built-up dirt and grime. Some of these kits use sandpaper to wet sand the outer surface of the headlight, getting rid of the buildup. Afterwards, a protectant or polish can be used to clean up any leftover debris or residue, while giving a new layer of protection for your headlight lenses.
More importantly, restoring shine to your headlights will result in a safer driving experience. Cloudy headlight lenses can decrease visibility by as much as 80%.
How To Make Your Own DIY Headlight Restoration Kit

You really only need two things to restore your headlights: Sandpaper and an UV coating. The kits, especially those with drill attachments, put everything you need into one box, but if you wanted to cherry-pick the best parts of all of them and make a kit you could use over and over again, here's what you'd need:
SandpaperWe'd start with a convenient pack of wet-dry velcro-backed sandpaper and a couple of soft hand sanding blocks. This would give you something to hold onto for doing large areas (our main complaint with most kits), and the versatility to get into corners and around curves.
UV protectant clearcoatDupli-Color sells what the company calls a headlight restoration kit. But it really isn't, it's just a coating kit. However, that's exactly what we need to finish our headlights after sanding, and it comes with enough in aerosol cans for repeated applications, so you can touch it up once or twice a year.
AccessoriesWhether you put your own kit together or use a premade one, you'll need:
- Dust mask
- Spare nitrile gloves
- Spray bottle with water
- Three or more microfiber cloths
- Glass cleaner
- Water resistant or exterior painter’s tape
- (A cotton or microfiber throw for your hood)
- (Bucket of water for rinsing pads and cloths)
- A comfy chair
Headlight Restoration Dos and Donts
- Clean your whole car before hand. This will keep any dirt from getting into your sanding, which can create scratches.
- Mask around your headlights with several inches of water resistant painter's tape. It'll protect your paint from both accidental sanding, and chemicals.
- Wipe down your headlights and check your work regularly. It can be hard to tell when you've sanded to an even surface.
- Pick a cloudy, cool day, or work inside.
- Mix and match chemicals. We found this out the hard way when some of the Rust-Oleum got on other sections. It clouded up all three other products, and we had to redo the whole headlamp.
- Let anything get on your sanding pads. We pulled a little piece of adhesive from gaffer tape into a Mother’s pad, and it bonded to the plastic, heated up, and crazed the headlamp.
- Open any chemicals before you are 100% ready to apply them. Most kits don’t give you much and have one-time-use wipes.
How Do You Use a Headlight Restoration Kit?
We always recommended to following the manufacturer's instructions when it comes to restoring your headlights, especially since some kits require a different process than others. Below you'll find some general steps so you can get an idea of what is involved with restoring your headlights.
- Start by washing your whole car, then wipe down the headlights, ensuring that the plastic lenses are wiped clean of dirt, grime, and dust. If you have old glass lenses, stop: You can't use most kits with glass lenses.
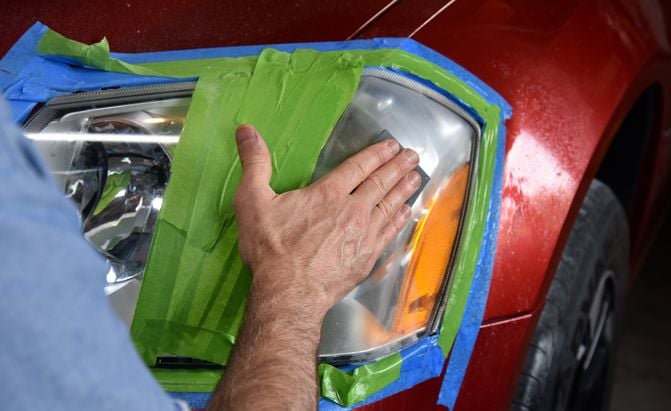
- No matter which product you're using, use painter's tape to mask off at least a couple of inches around your headlights to protect the paint and chrome.
- Some products come with a pre-treatment formula or cleaning solution that should be applied to make sure your lenses are clean.
- Most kits sandpaper to lightly sand down your headlight lenses. This step will vary based on the product you're using, so refer to your instructions. Typically however, you'll use different grit sand papers to get all the haze and oxidization off your headlights. Starting at the bottom and working your way up helps to see what you're doing.
- Once completed, apply any sort of polishing or sealant product to your headlights to protect them from hazing or oxidization for a year or two. These need curing time, ranging from one hour to 24 hours, before you can get them wet.
Recent Updates:
July 21, 2022: Removed Meguiar's 1-step kit, Rain-X, Turtle Wax, Phillips, and CLT kits due to poor reviews. Added Meguiar's G2970 Two Step Headlight Restoration Kit. Added how-to sections.
July 20, 2022: Added photos and results of hands-on testing and. Awarded Editor's Pick to Mothers headlight restoration kit, second place to 3M, third to Sylvania, and moved Rust-Oleum to last place. Removed extra sections on 3M kit.
May 28, 2021: Updated with a promoted product recommendation.
October 20, 2020: Updated with new product recommendations.
We are committed to finding, researching, and recommending the best products. We earn commissions from purchases you make using the retail links in our product reviews. Learn more about how this works.
Photo credit: David Traver Adolphus / AutoGuide.com.

After completing a degree project in automotive design, Dave wrote and photographed for almost a decade in print car magazines (remember those?), before transitioning to digital. He now subjects a series of old high-performance cars to the roads and weather in Vermont and wonders why they're always expensively broken. Please stop when you see him crawling under one on the side of the road.
More by David Traver Adolphus


Comments
Join the conversation
Is RestoWipe worth the money? If so, how does it rate?
Was horrible on my headlights. Made them worse than before. Be careful. The instructions on package are not complete. Found out the hard way.
STOP RECOMMENDING THIS GARBAGE TO PEOPLE! Sanding ruins the OEM UV coating! Use Fleisher's Headlight Restoration Spray! It just sprays on and wipes off the yellow haze!
Here's an amazon link: https://a.co/d/6fMhvY2